weatherCard
Welcome to the docs of weatherCard. This is a component you can use freely to show others your city's weather data. You can visit its Github to clone it.
weatherCard utilizes Open Weather API, so you will need an API key from them. You can use their free plan if you plan on building a small project. Also, you will need a key for Maps Static API from Google to use popup maps feature.
About the project
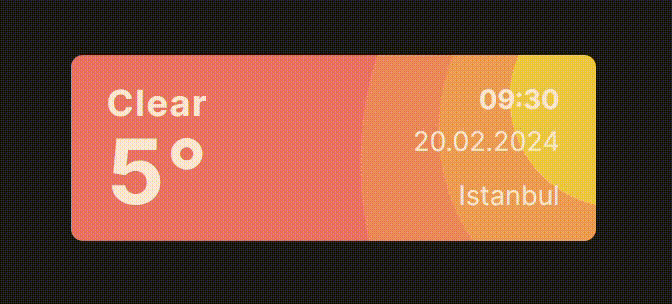
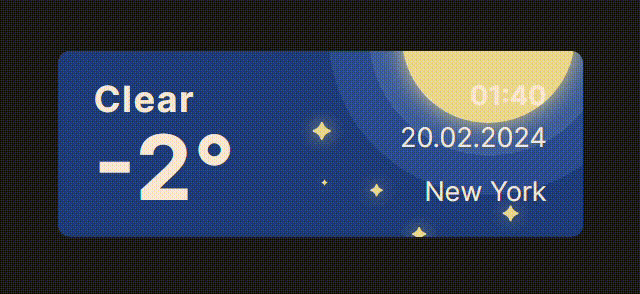
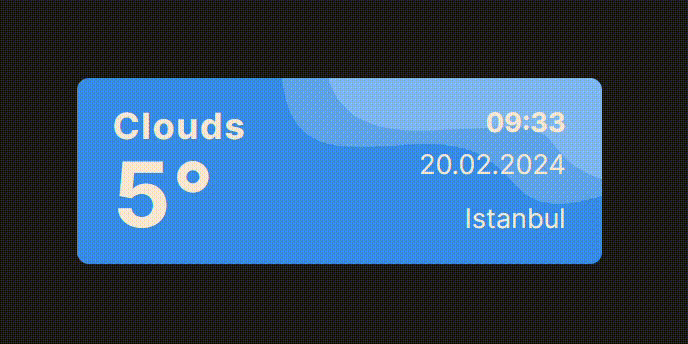
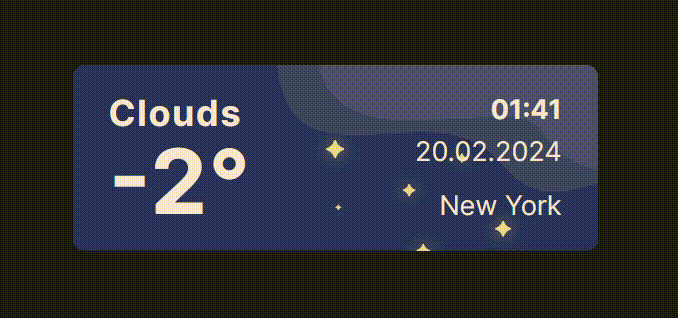
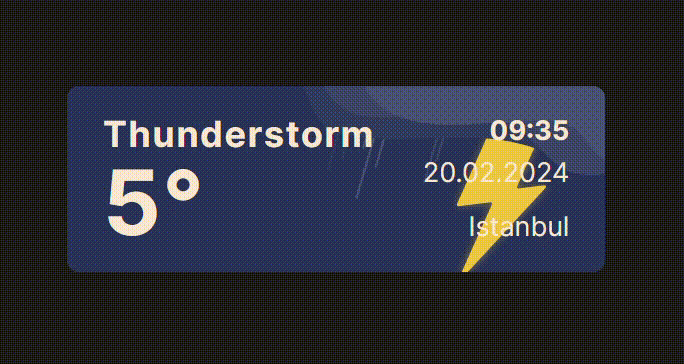
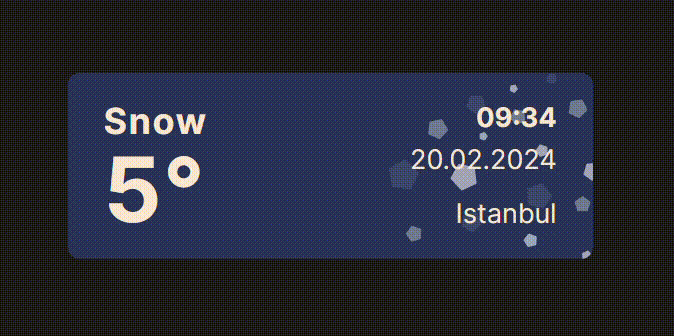
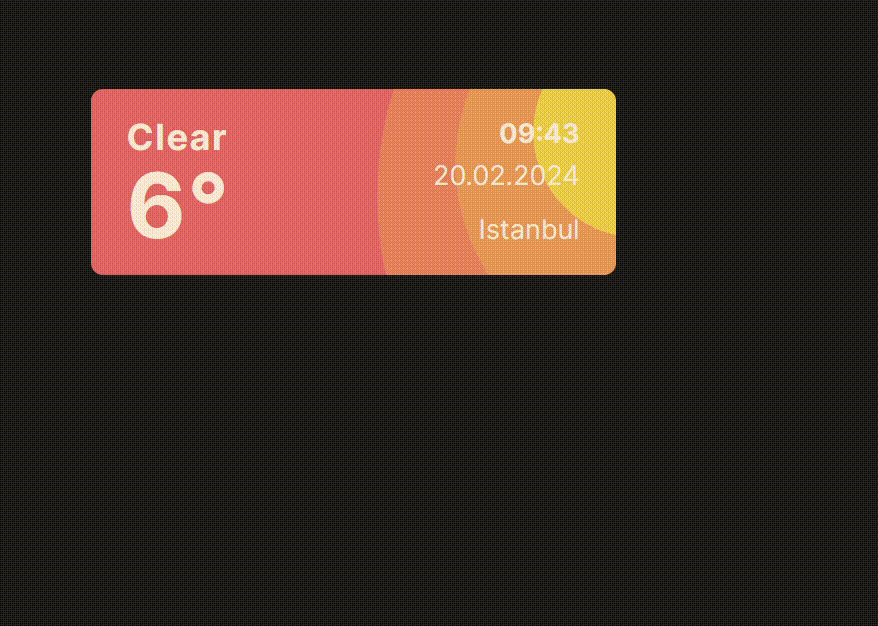
This component supports every possible weather condition mentioned in Open Weather API. It has 7 different animated backgrounds for various situations: Clear(Morning), Clear(Night), Clouds(Morning), Clouds(Night), Rain, Thunderstorm and Snow. Even if the title isn't directly supported, it's replaced by the most similar weather condition. Here are those animations (except rain):
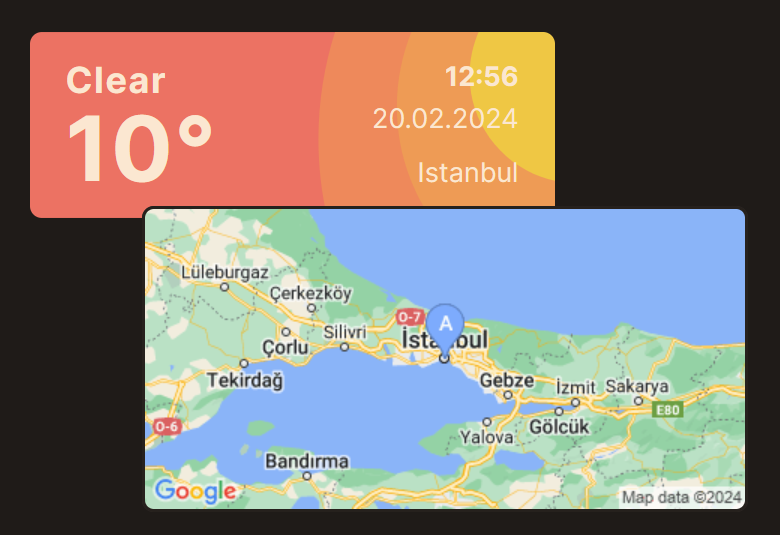
Besides the weather condition, weatherCard also has a popup feature that shows the geographical location of your city. It uses Google's Maps Static API which is also customizable. We will dive deeper into it later. Here's how the maps function work:

Installation
To clone weatherCard, you can simply go ahead and do:
# Install npm and clone the repository. Then, install the packages.
npm install -g npm
git clone https://github.com/ondersumer07/weatherCard.git
cd weatherCard
npm install
Now you will have a Skeleton project that works with SvelteKit and also includes Tailwind CSS and Floating UI. It might sound like much, but it makes development way easier. If you don't want to use those libraries, you can take this work as an example and create the component yourself from scratch.
To get the project working, create a .env file in your root directory. Inside it should
look like this:
#PRIVATE
OPEN_WEATHER_API_KEY=YOUR_API_KEY_HERE
MAPS_API_KEY=YOUR_API_KEY_HERE
Customisation
Now that you've set up the project correctly, everything should be in working order, but displaying Istanbul information everywhere. We need to make some changes for it to display your city.
Default variables
First, you can go ahead and change the default variables to somewhere you're close to. Although it will never show up if everything goes smoothly, it's good practice to take caution.
// /src/lib/weatherCard/weatherCard.svelte

// Set default variables
export let currentCity = 'Ankara';
export let timezoneCity = 'Europe/Istanbul';
export let weatherState = 'Sunny';
export let degreesCelcius = 21;
export let mapsURL = '';
You can customize these as you like. Just make sure they're valid. I leave the mapsURL empty in purpose. Because even if it's like this, it will still work, just won't show the popup. I believe losing that function is not a major issue when I can't fetch weather data at all.
Changing your city
After that, you should adjust your Javascript file to match your city.
// /src/routes/+page.server.js

// IMPORTANT change this city according to your location!
let currentCity = 'Istanbul';
The currentCity is the variable used in during both fetching weather data and maps
URL creation. If you don't change this variable, the data that is showing will be Istanbul's data.
Changing units
Open Weather API allows you to use either Celcius or Fahrenheit. To adjust this setting (default is Celcius), you need to change a bit while calling the API.
// /src/routes/+page.server.js

const fetchWeather = async () => {
	const weatherRes = await fetch(
		// Fetch from API, units=metric for universality. Change to "units=imperial" if you want to display Fahrenheit.
		"https://api.openweathermap.org/data/2.5/weather?q={currentCity}&appid={OPEN_WEATHER_API_KEY}&units=metric"
	);
	...
Note that there are "$" signs before currentCity and OPEN_WEATHER_API_KEY which makes them a universal variable in Svelte.
Timezone !important
If you're outside of Europe, or want to use a static timezone, you can change it in your main page file. You can enter a timezone directly, or fetch it from your database, or leave it as is if you're living in Europe.
<!-- /src/routes/+page.svelte -->

{:then [weather, mapsURL]}
	<!-- IMPORTANT, if you're in a different timezone than "Europe/YOURCITY", change the timezone city. -->
	<WeatherCard
		currentCity={weather.name}
		timezoneCity={'Europe/' + weather.name}
		weatherState={weather.weather[0].main}
		degreesCelcius={Math.round(weather.main.temp)}
		{mapsURL}
		/>
{/await}
This code assumes that you're in Europe and that Javascript recognizes your city as a
timezone. You can adjust timezoneCity value to fit your needs.
Finally, it should all be working! Hooray!
Adding other weather conditions (optional)
If you want, you can add or remove weather conditions to suit your needs. Only thing you
need to do is upload your new background file to /static/weatherBg and link it.
// /src/lib/weatherCard/weatherCard.svelte

// Create and decide on background URL.
let backgroundUrl = "bg-[url('/weatherBg/sunny-animated.svg')]";

	if (weatherState == 'Clear' && 7 < currentHour && currentHour < 20) {
		backgroundUrl = "bg-[url('/weatherBg/sunny-animated.svg')]";
	} else if (weatherState == 'Clear') {
		backgroundUrl = "bg-[url('/weatherBg/night-animated.svg')]";
	} else if (
		(weatherState == 'Clouds' ||
			weatherState == 'Mist' ||
			weatherState == 'Smoke' ||
			weatherState == 'Haze' ||
			weatherState == 'Dust' ||
			weatherState == 'Fog' ||
			weatherState == 'Sand' ||
			weatherState == 'Ash' ||
			weatherState == 'Squal') &&
		7 < currentHour &&
		currentHour < 20
	)

	...

	} else if (weatherState == 'Thunderstorm') {
		backgroundUrl = "bg-[url('/weatherBg/thunderstorm-animated.svg')]";
	} else if (weatherState == 'Snow') {
		backgroundUrl = "bg-[url('/weatherBg/snowy-animated.svg')]";
	}
You can add or adjust the if conditions to your liking!
Maps settings (optional)
If you'd like, you can also adjust the maps popup.
// /src/routes/+page.server.js

// Create mapsURL, you can adjust "zoom", "size", "markers" and "label."
let mapsURL =
	'https://maps.googleapis.com/maps/api/staticmap?center=' +
	currentCity +
	'&zoom=3&size=400x200&markers=color:red|label:O|' +
	currentCity +
	'&key=' +
	MAPS_API_KEY;
You can pretty much change everything about the look of your map. I prefer a simpler map, but if you'd like a more complex one, you can definitely have one.
zoom=7, markers=color:blue|label:A|
zoom=12, markers=color:red|label:O|
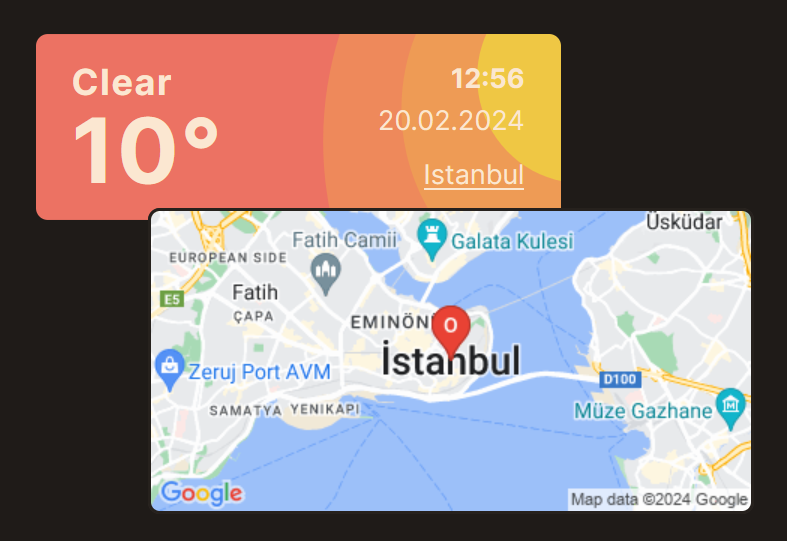
zoom=16, markers=color:green|label:X|
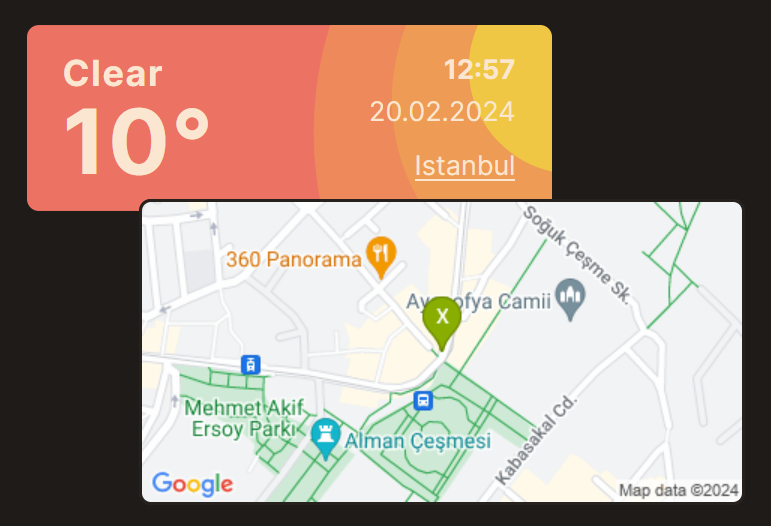
These are just some examples, check the documentation from Google here.
Final Notes
I've had a lot of fun developing this component for my website. I'm using free versions of all these APIs, but you can scale it if you wish to. Huge shout-out to Burak Sümer as he was with me the whole process. You can use and change weatherCard however you like, and I hope you'll have as much fun as I did! If you have any questions regarding this, don't hesitate to contact me via email. Lastly, I hope it's sunny where you live!